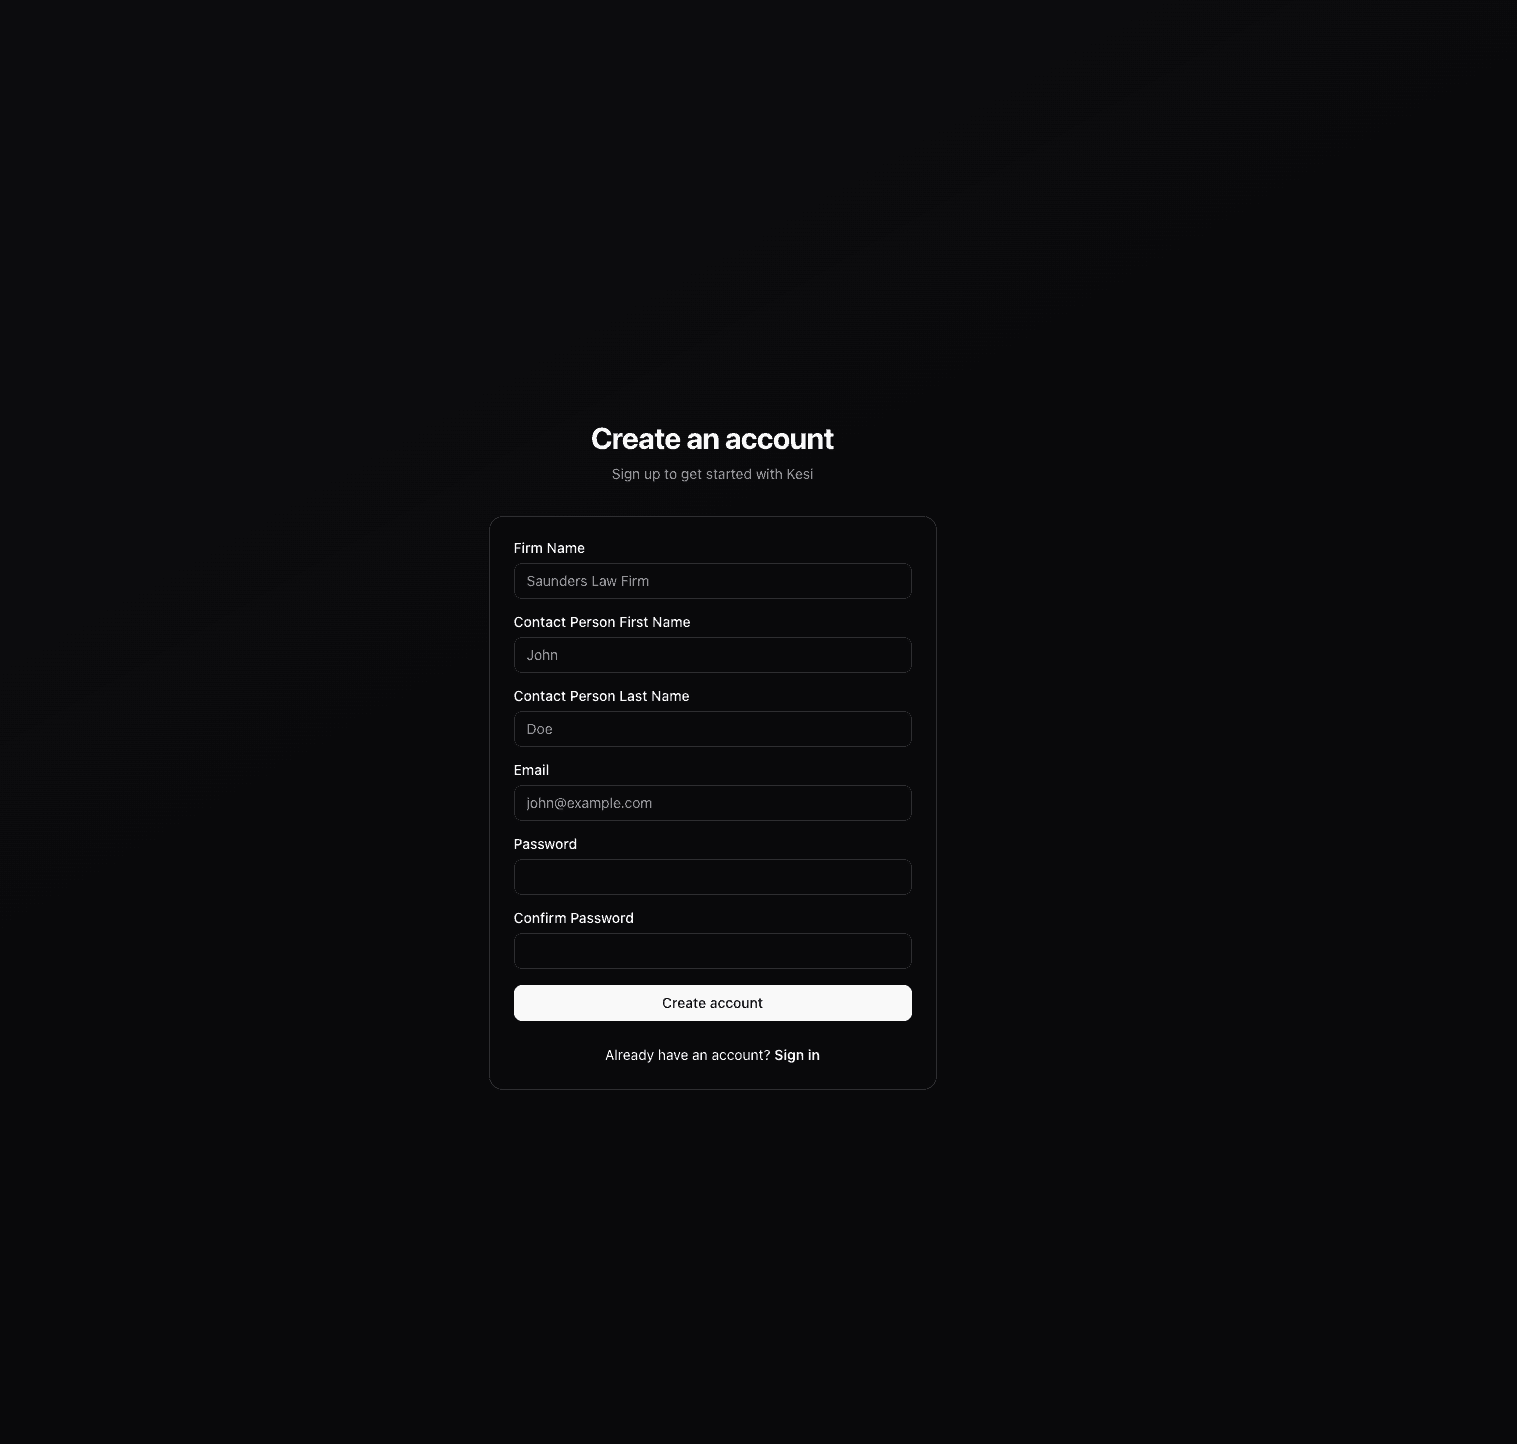
Create an account
Goal
Get secure access to a dedicated Kesi workspace for you and your team.
What this does
Sign up for Kesi in a few clicks so you can start managing your cases, clients, and billing in one place.
Step-by-step
- 1
Go to the Kesi home page and click "Start Free Trial" or "Sign Up".
- 2
Enter your work email, full name, and a secure password.
- 3
Confirm your email address using the verification link we send you.
- 4
Log in to Kesi with your new credentials to access your workspace.
Create a company profile
Goal
Set up firm details so everything you send from Kesi looks professional and on brand.
What this does
Set up your firm profile so invoices, documents, and client communication are branded and accurate.
Step-by-step
- 1
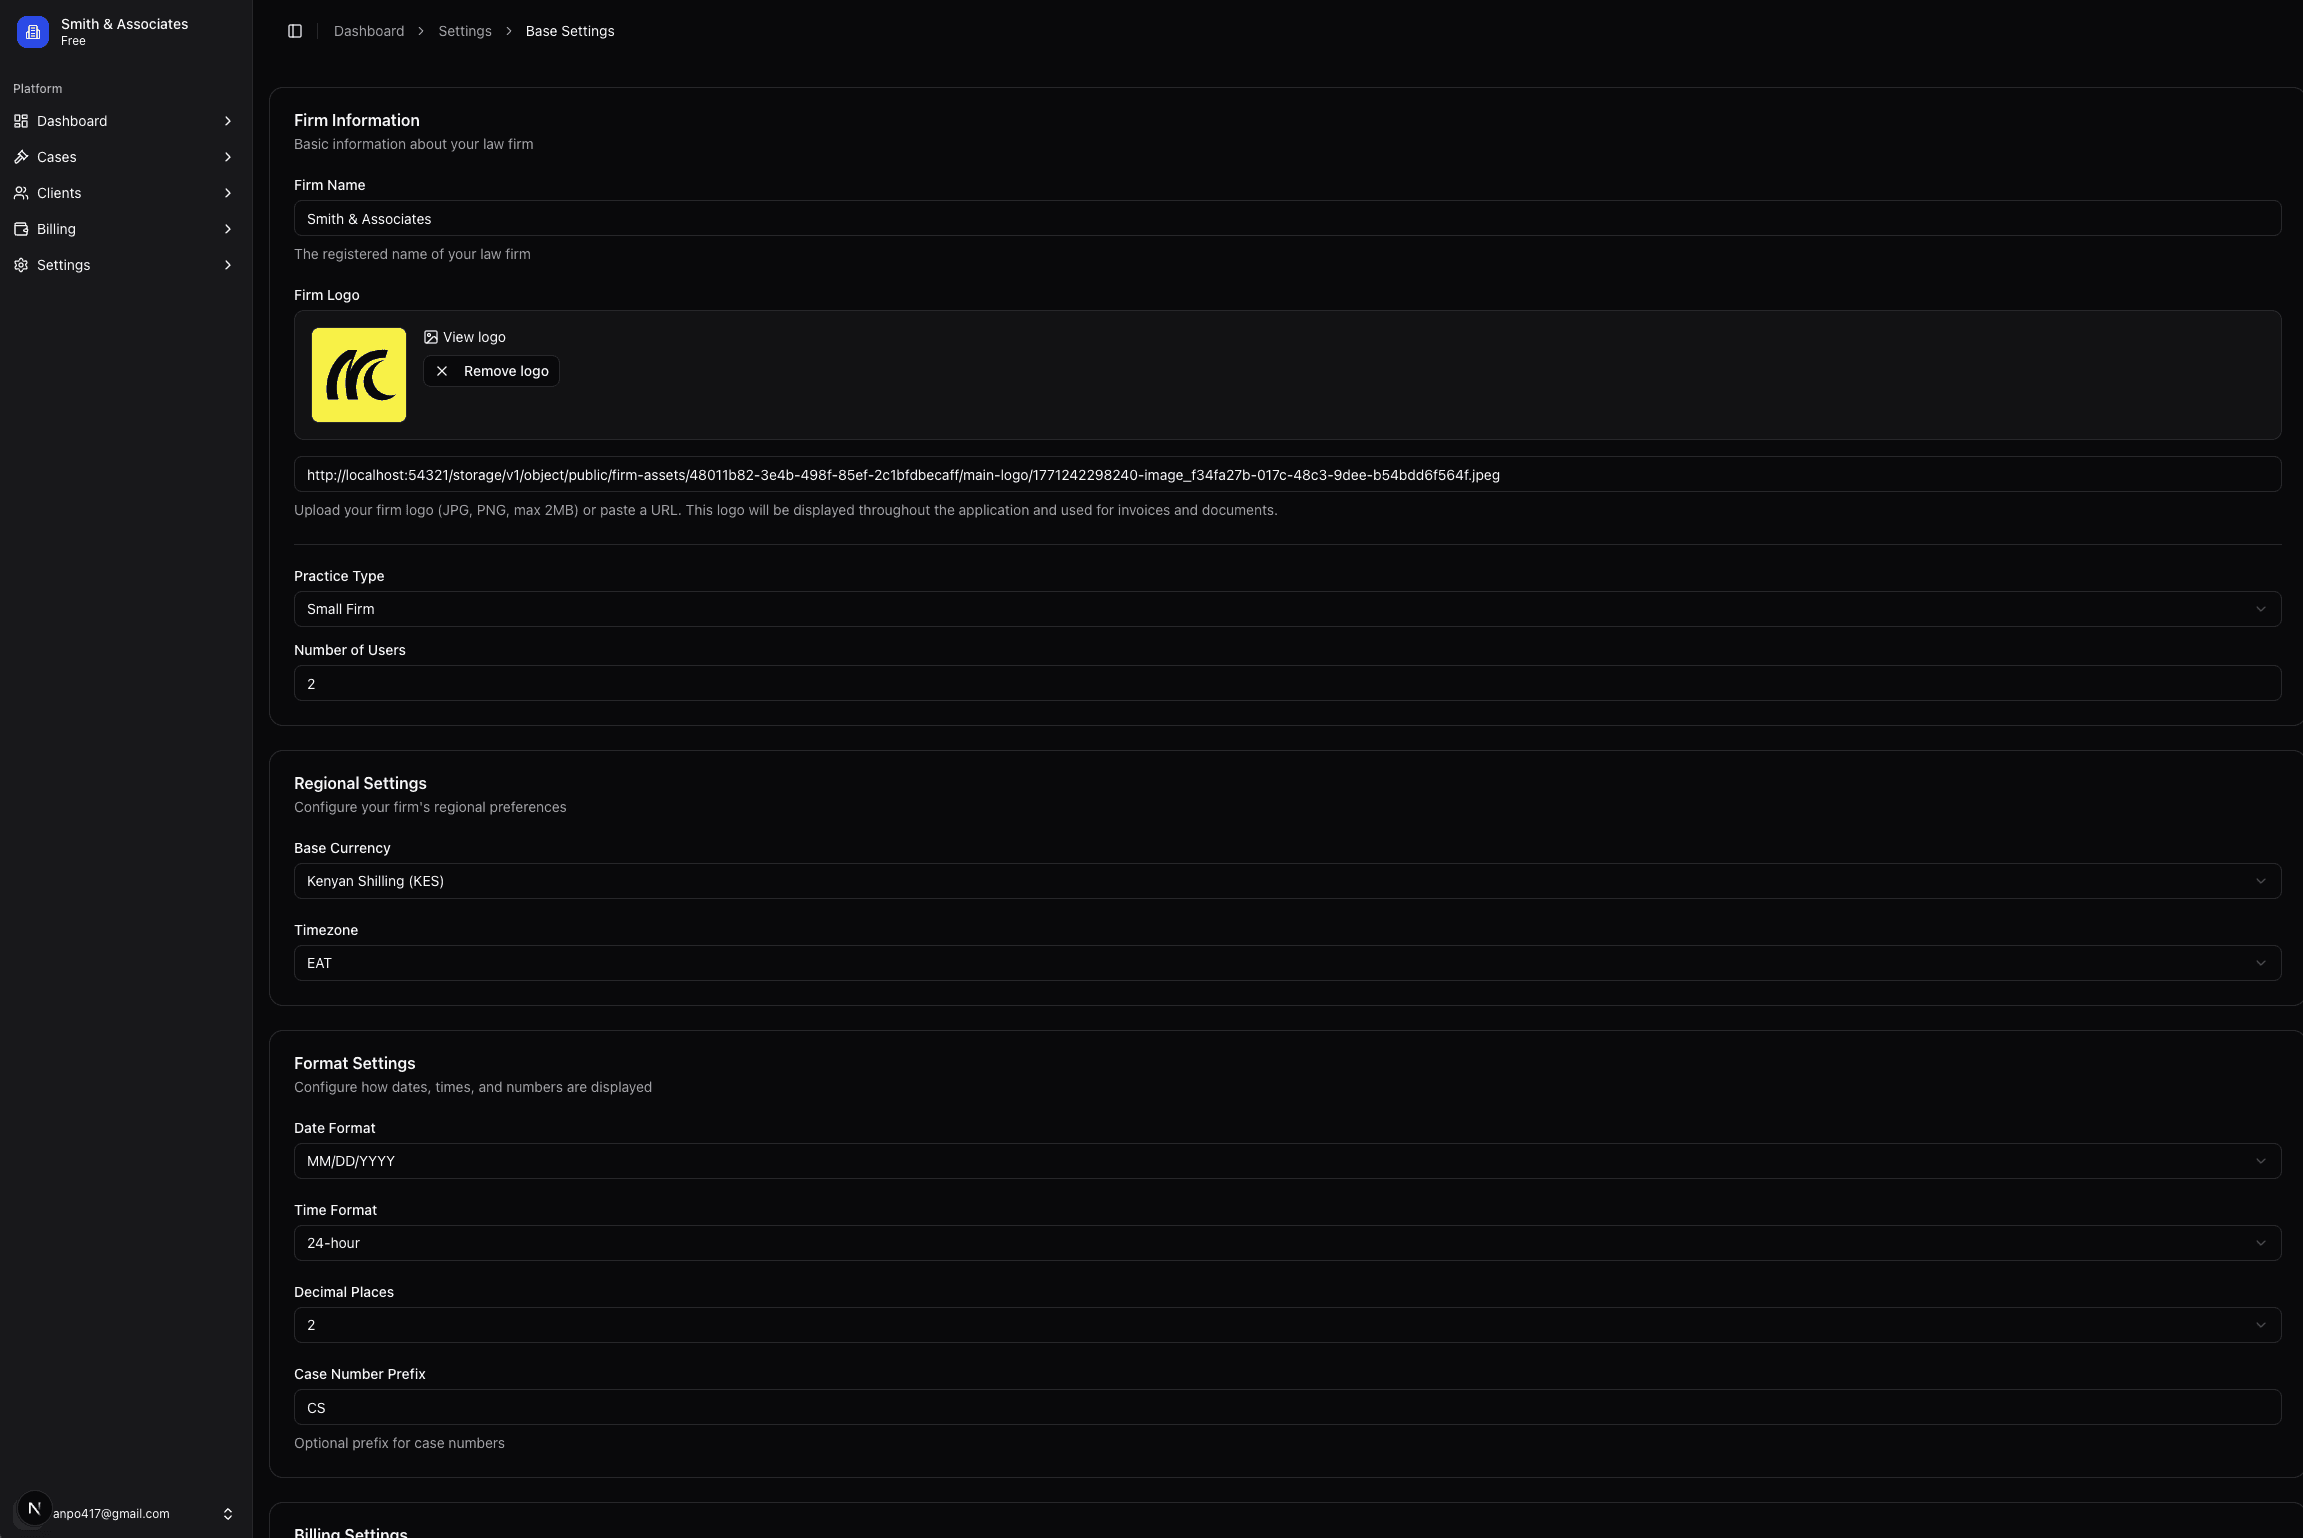
After logging in, open the dashboard and go to Settings.
- 2
Select the Firm or Company section in the sidebar.
- 3
Fill in your firm name, logo, address, and contact details.
- 4
Save your changes so they appear on invoices and client communications.
Create a client
Goal
Add a central record for each client so you can attach their cases, documents, and invoices.
What this does
Add new clients so you can link their cases, documents, invoices, and court dates in one place.
Step-by-step
- 1
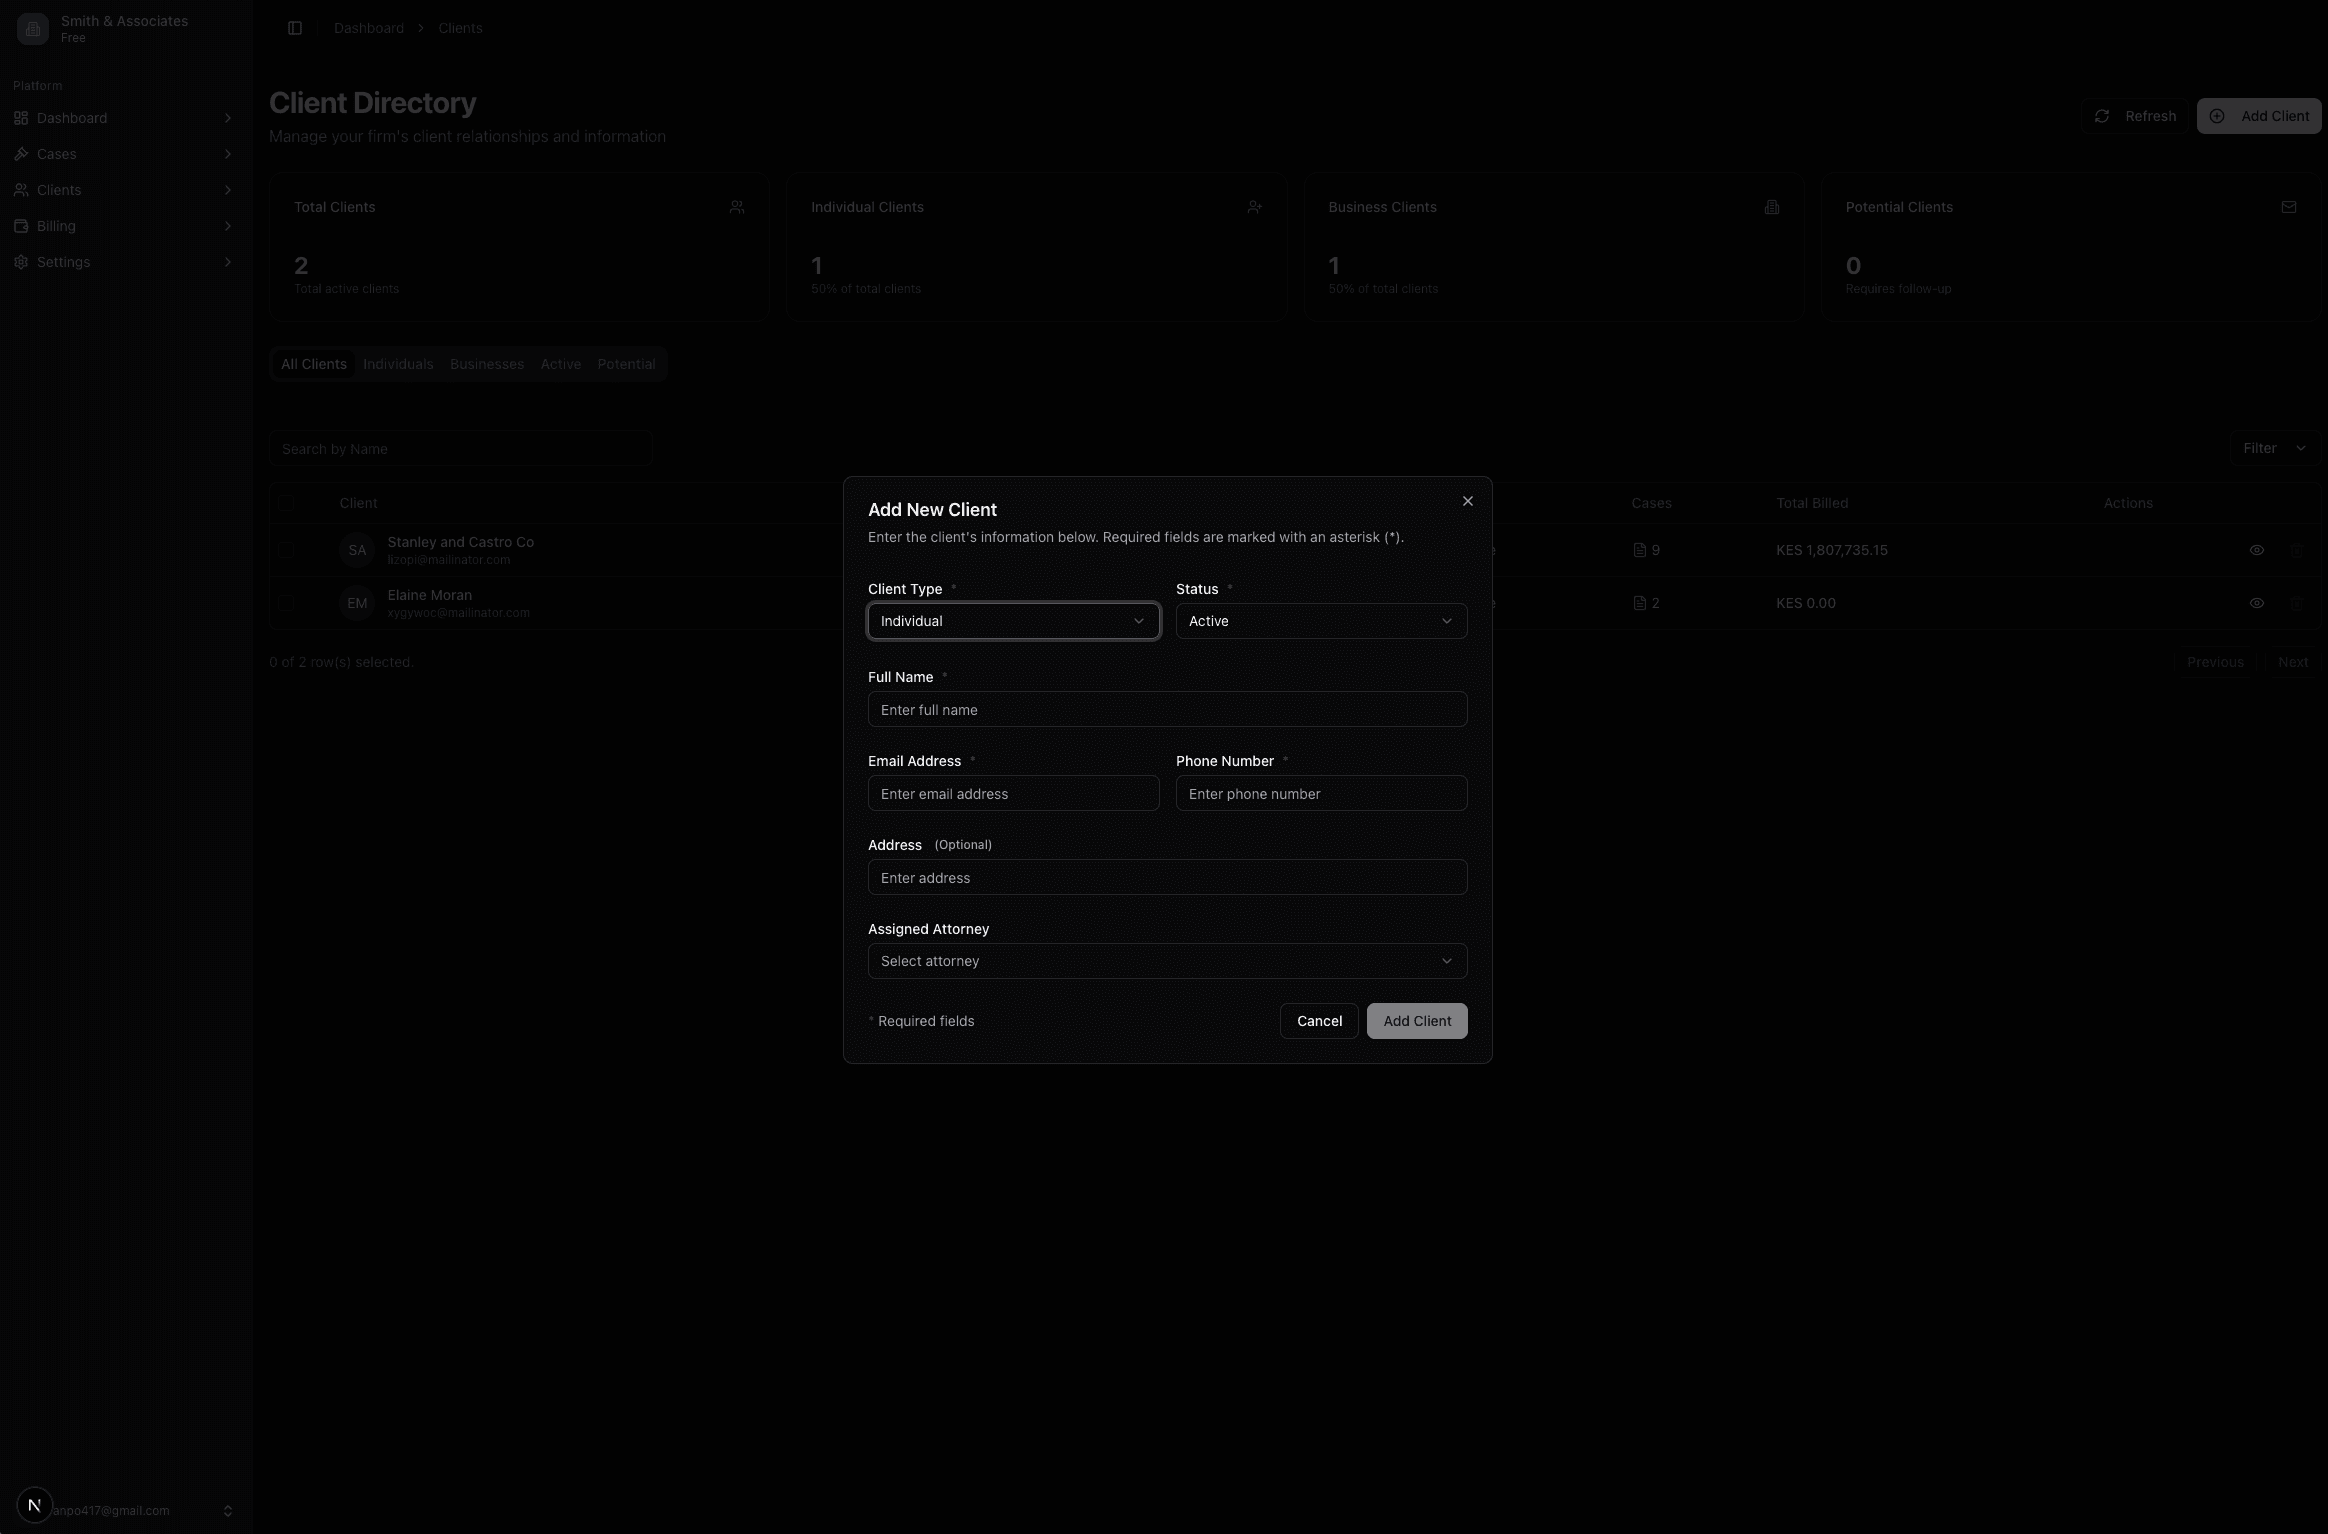
From the dashboard, go to Clients.
- 2
Click the "New Client" or "Add Client" button.
- 3
Enter client details such as name, contact information, and any identifiers.
- 4
Save the client to make them available when creating cases and invoices.
Create a case
Goal
Open a new matter so you can track all work, dates, and billing for a specific client in one place.
What this does
Create a case to track matters, documents, court dates, and billing activity for a specific client.
Step-by-step
- 1
Go to Cases in the dashboard.
- 2
Click the "New Case" button.
- 3
Select the client for this case and add basic case details (title, reference, matter type).
- 4
Set key dates or deadlines if available and save the case.
Create invoices for cases or clients
Goal
Turn your work into clear invoices that are easy for clients to understand and pay.
What this does
Generate professional invoices linked to cases or clients so you can track billable work and payments.
Step-by-step
- 1
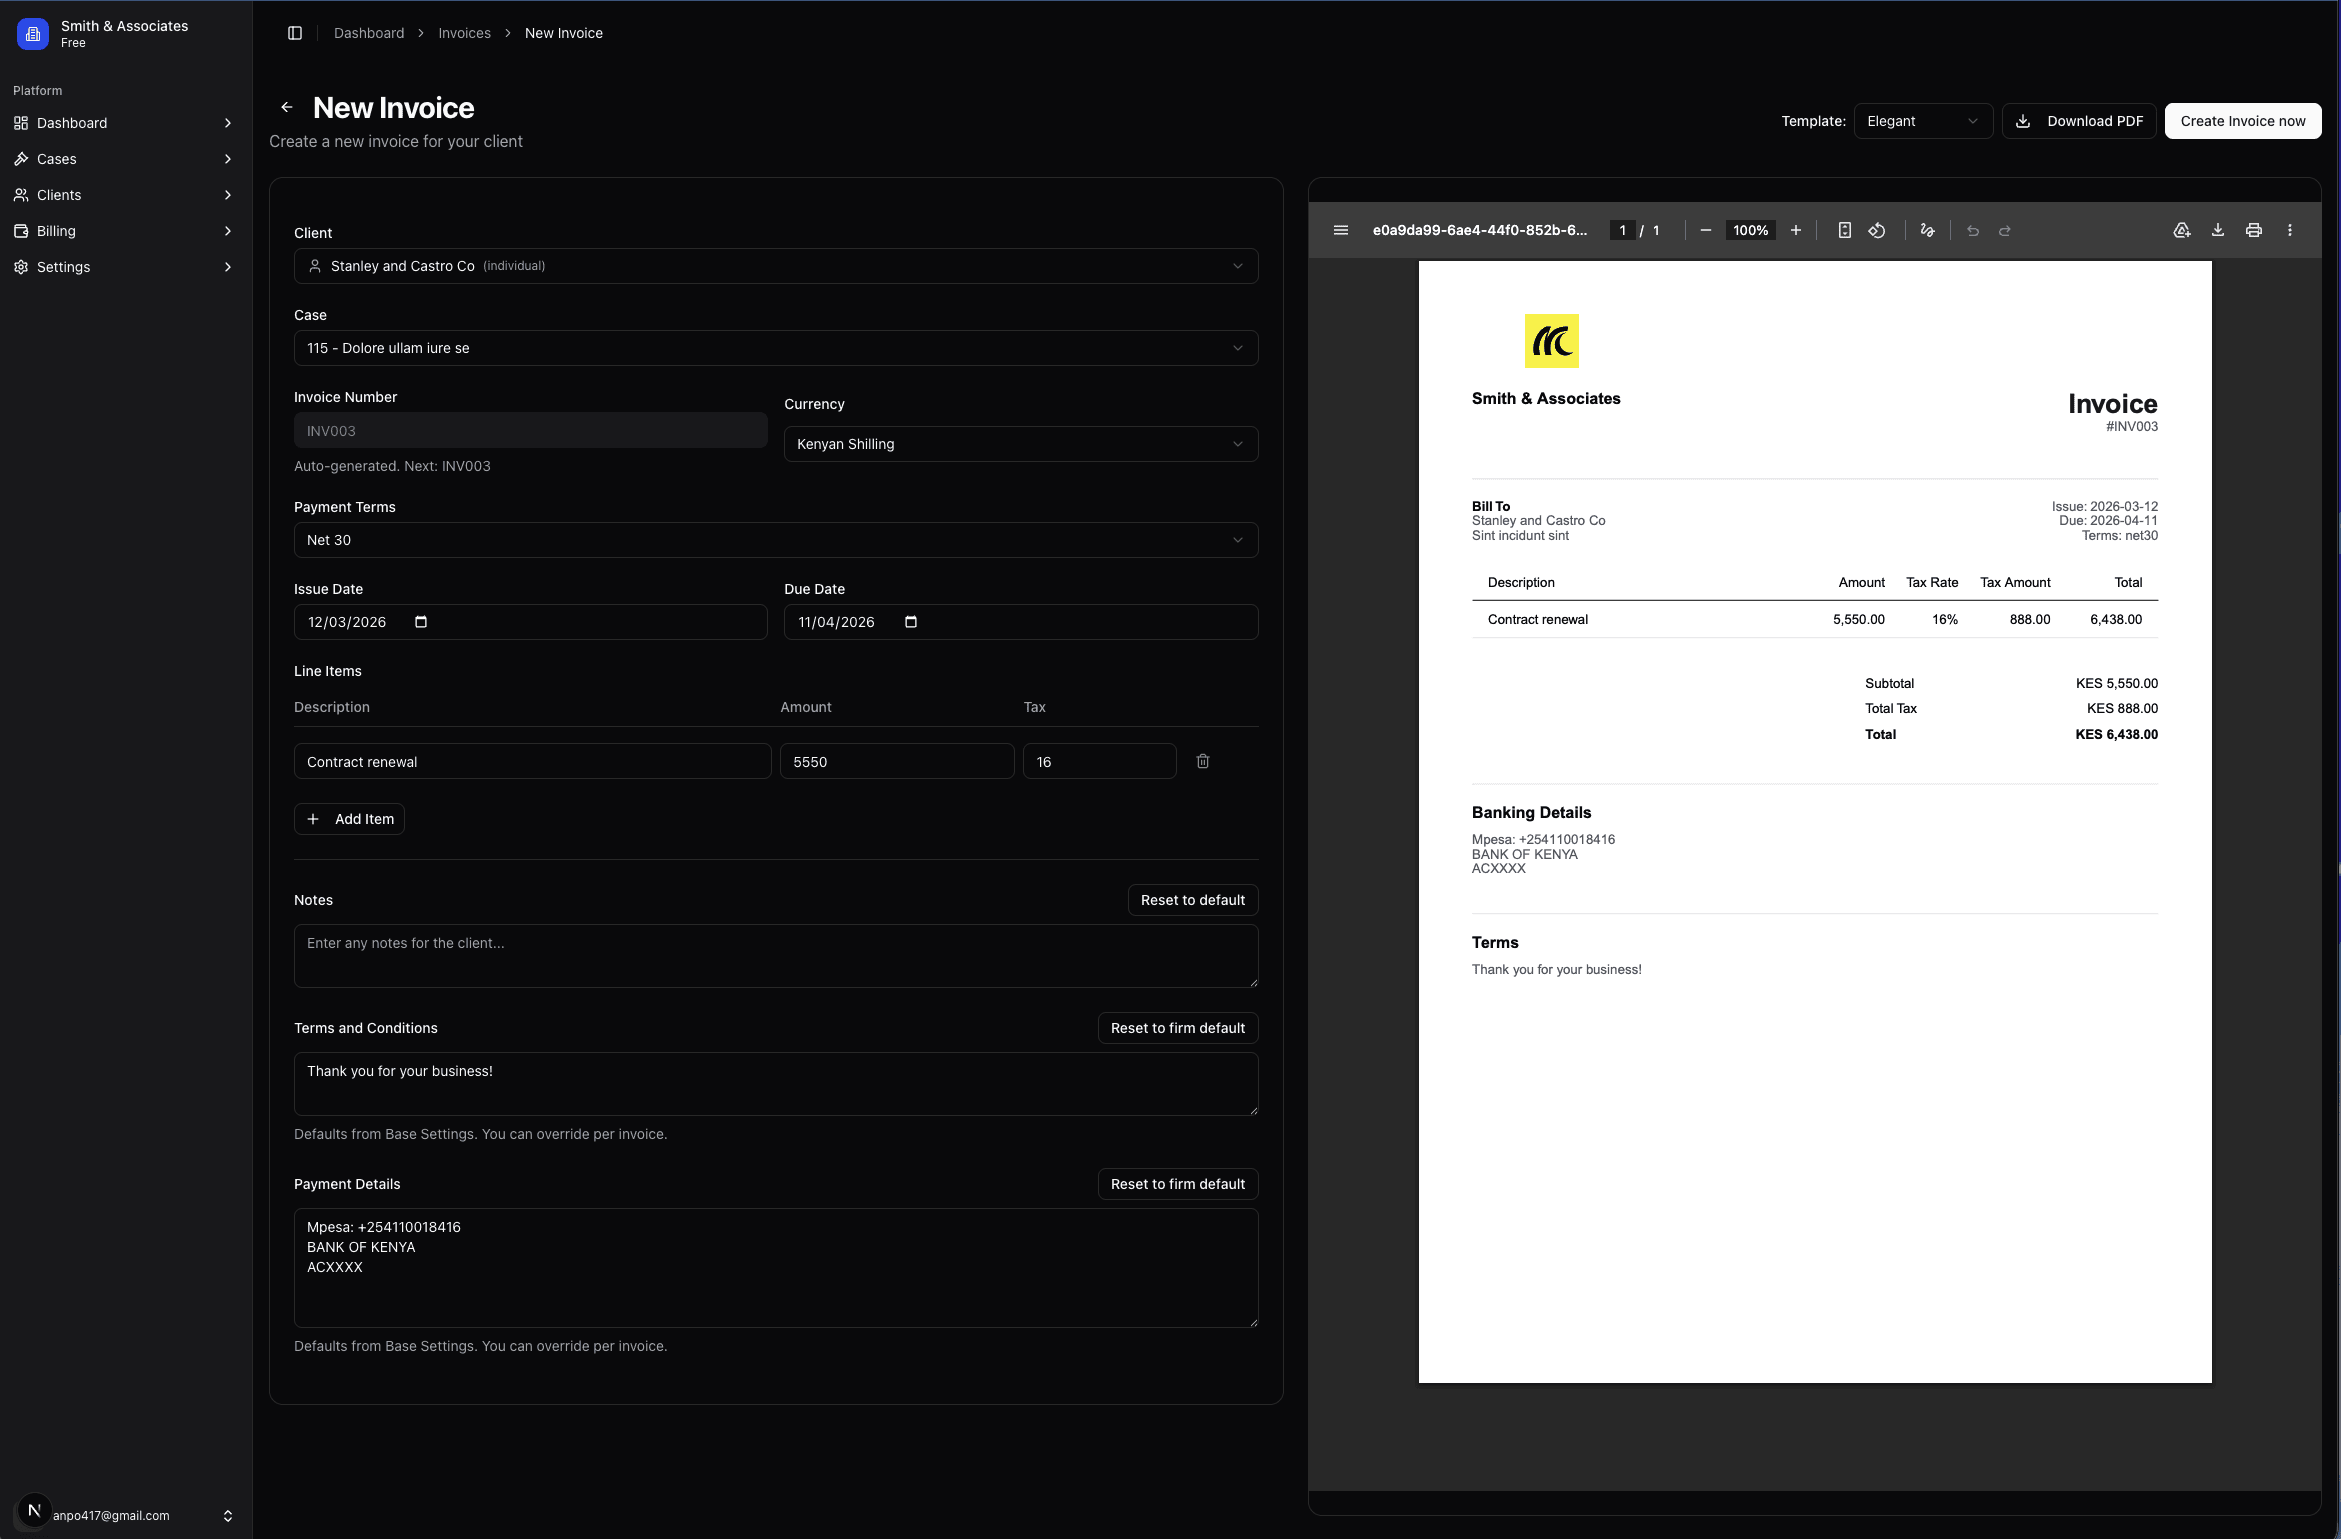
Open Billing or Invoices from the dashboard.
- 2
Click "New Invoice".
- 3
Choose whether the invoice is for a specific case or directly for a client.
- 4
Add line items (fees, time entries, expenses) and review totals and tax.
- 5
Save and send the invoice to your client via email or your preferred channel.
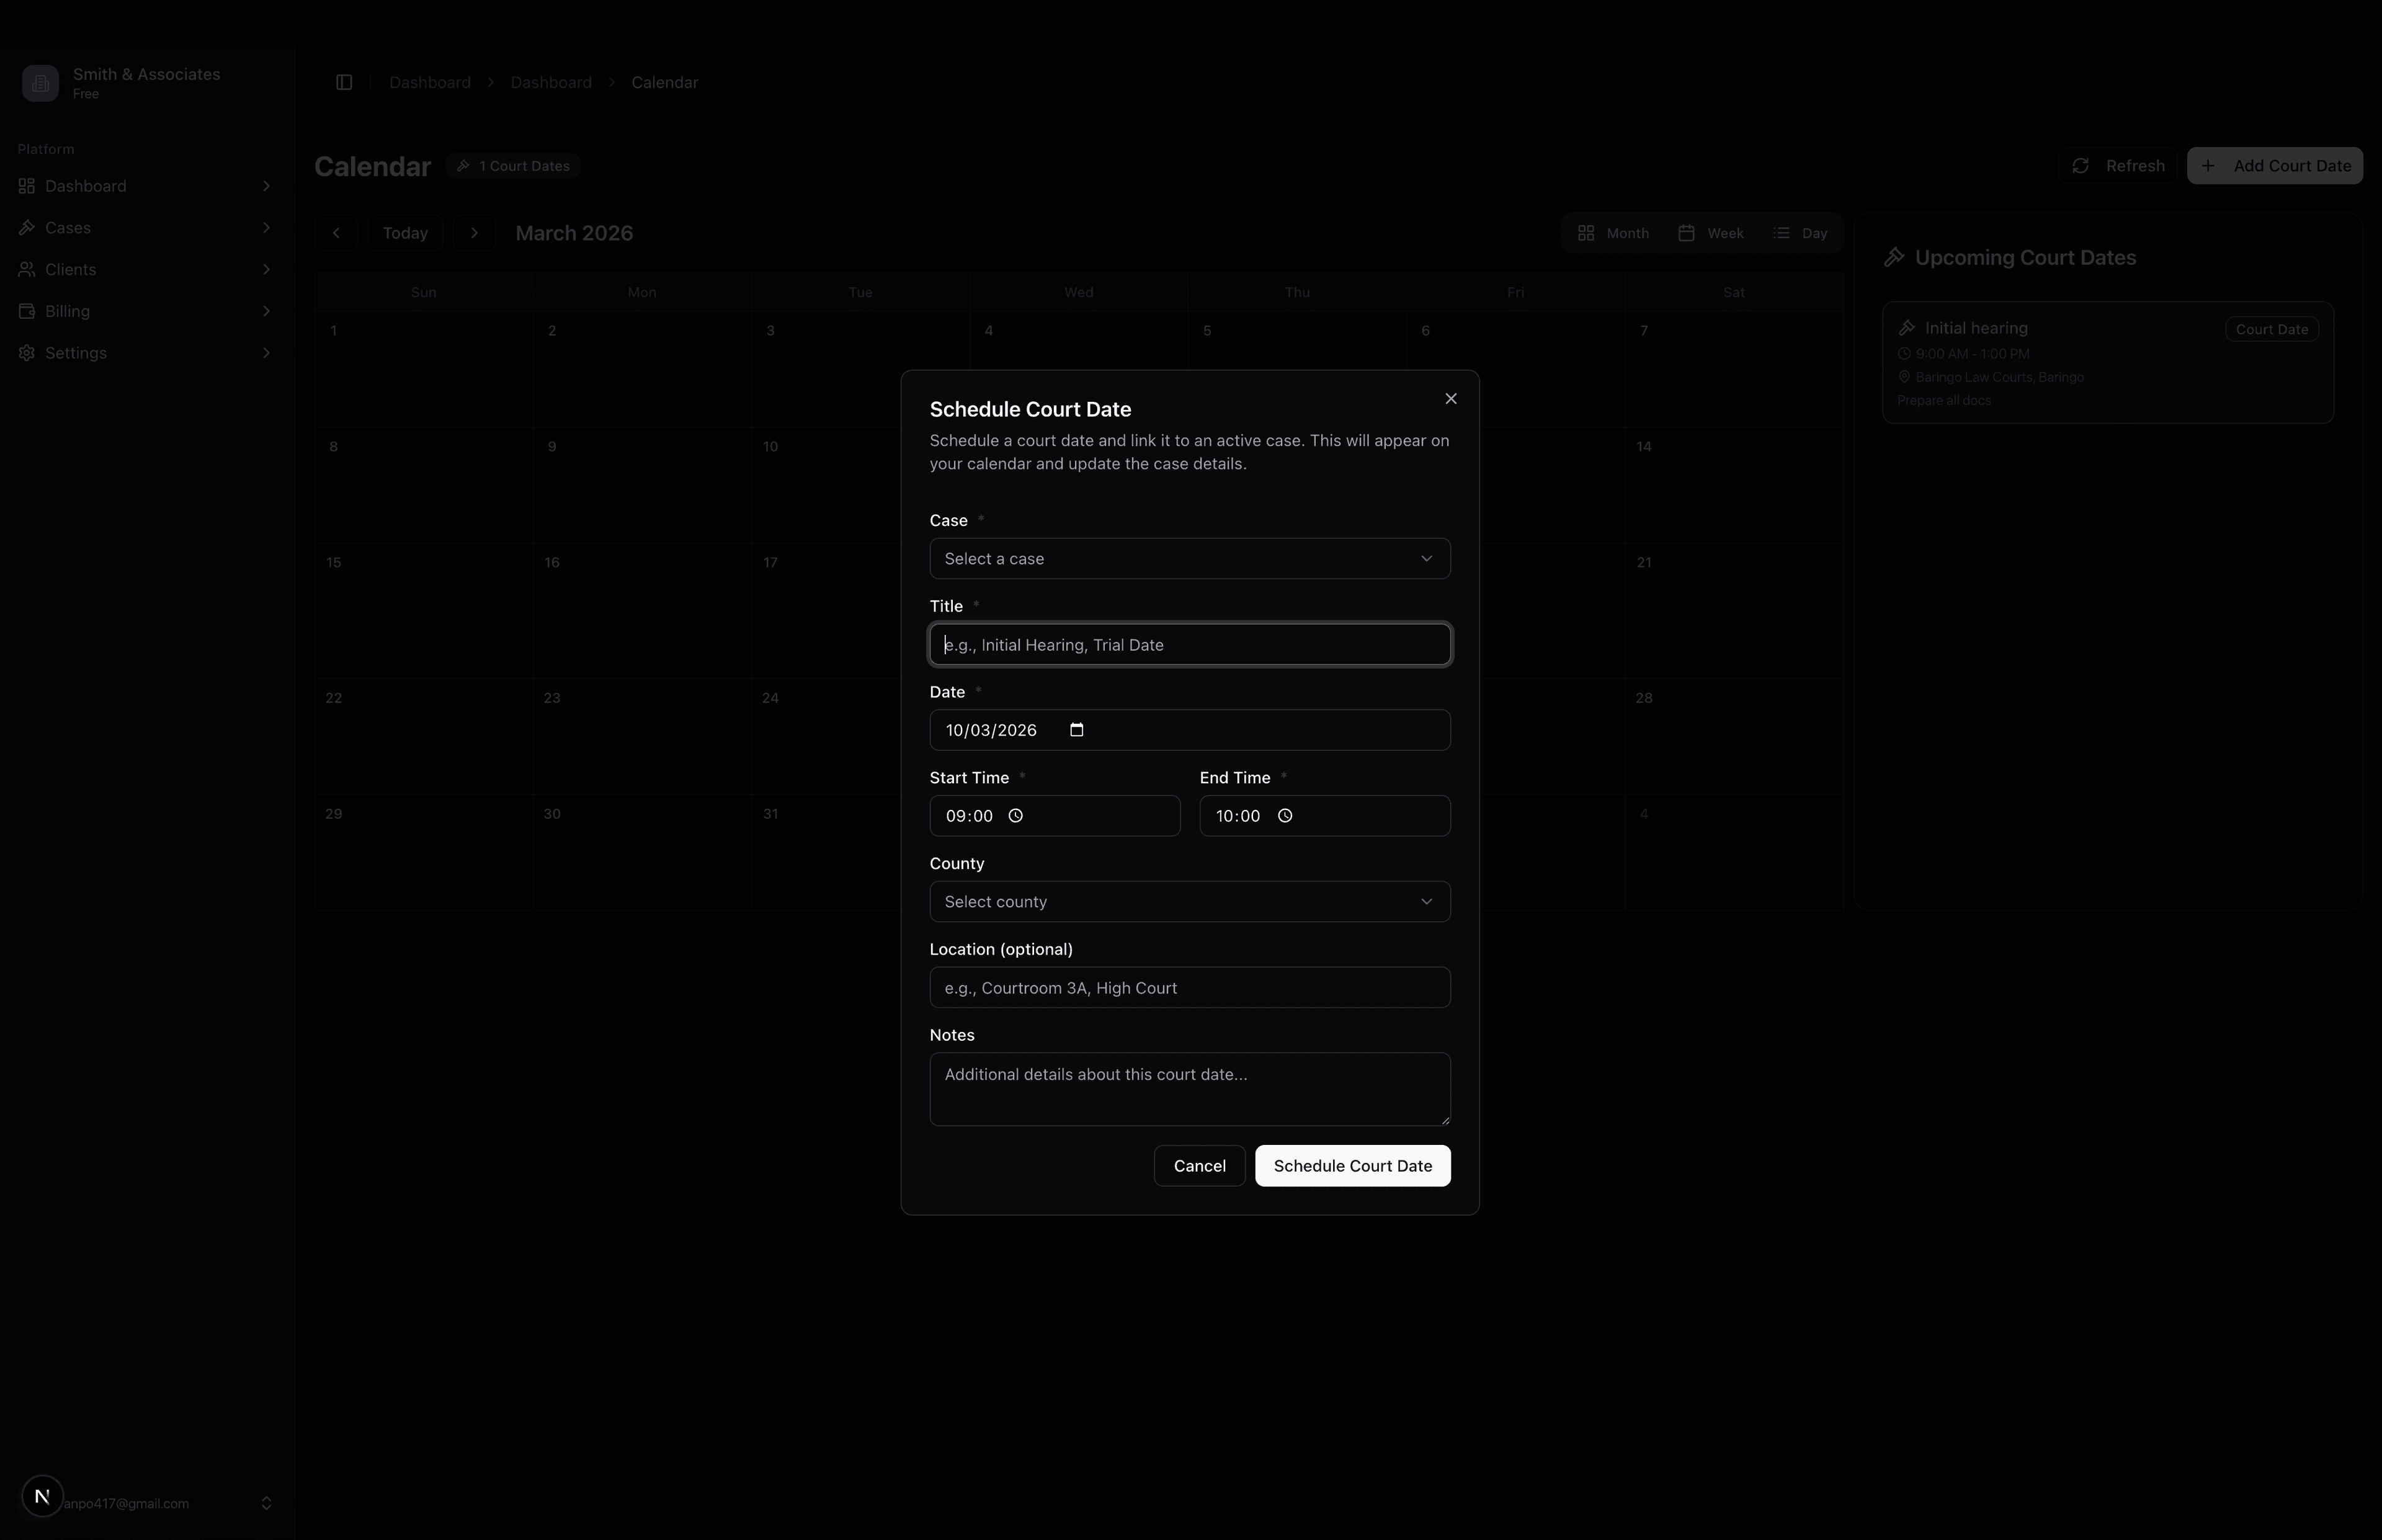
Schedule court dates
Goal
Keep every important hearing and deadline visible on a shared calendar and linked to the right case.
What this does
Keep track of hearings and key deadlines by adding court dates that stay linked to their cases.
Step-by-step
- 1
Navigate to the Calendar or Court Dates section in the dashboard.
- 2
Click "Add Court Date" or the equivalent button.
- 3
Select the related case and enter the court date, time, and location.
- 4
Add any notes or reminders you need for the hearing.
- 5
Save the event so it appears on your calendar and in the case timeline.
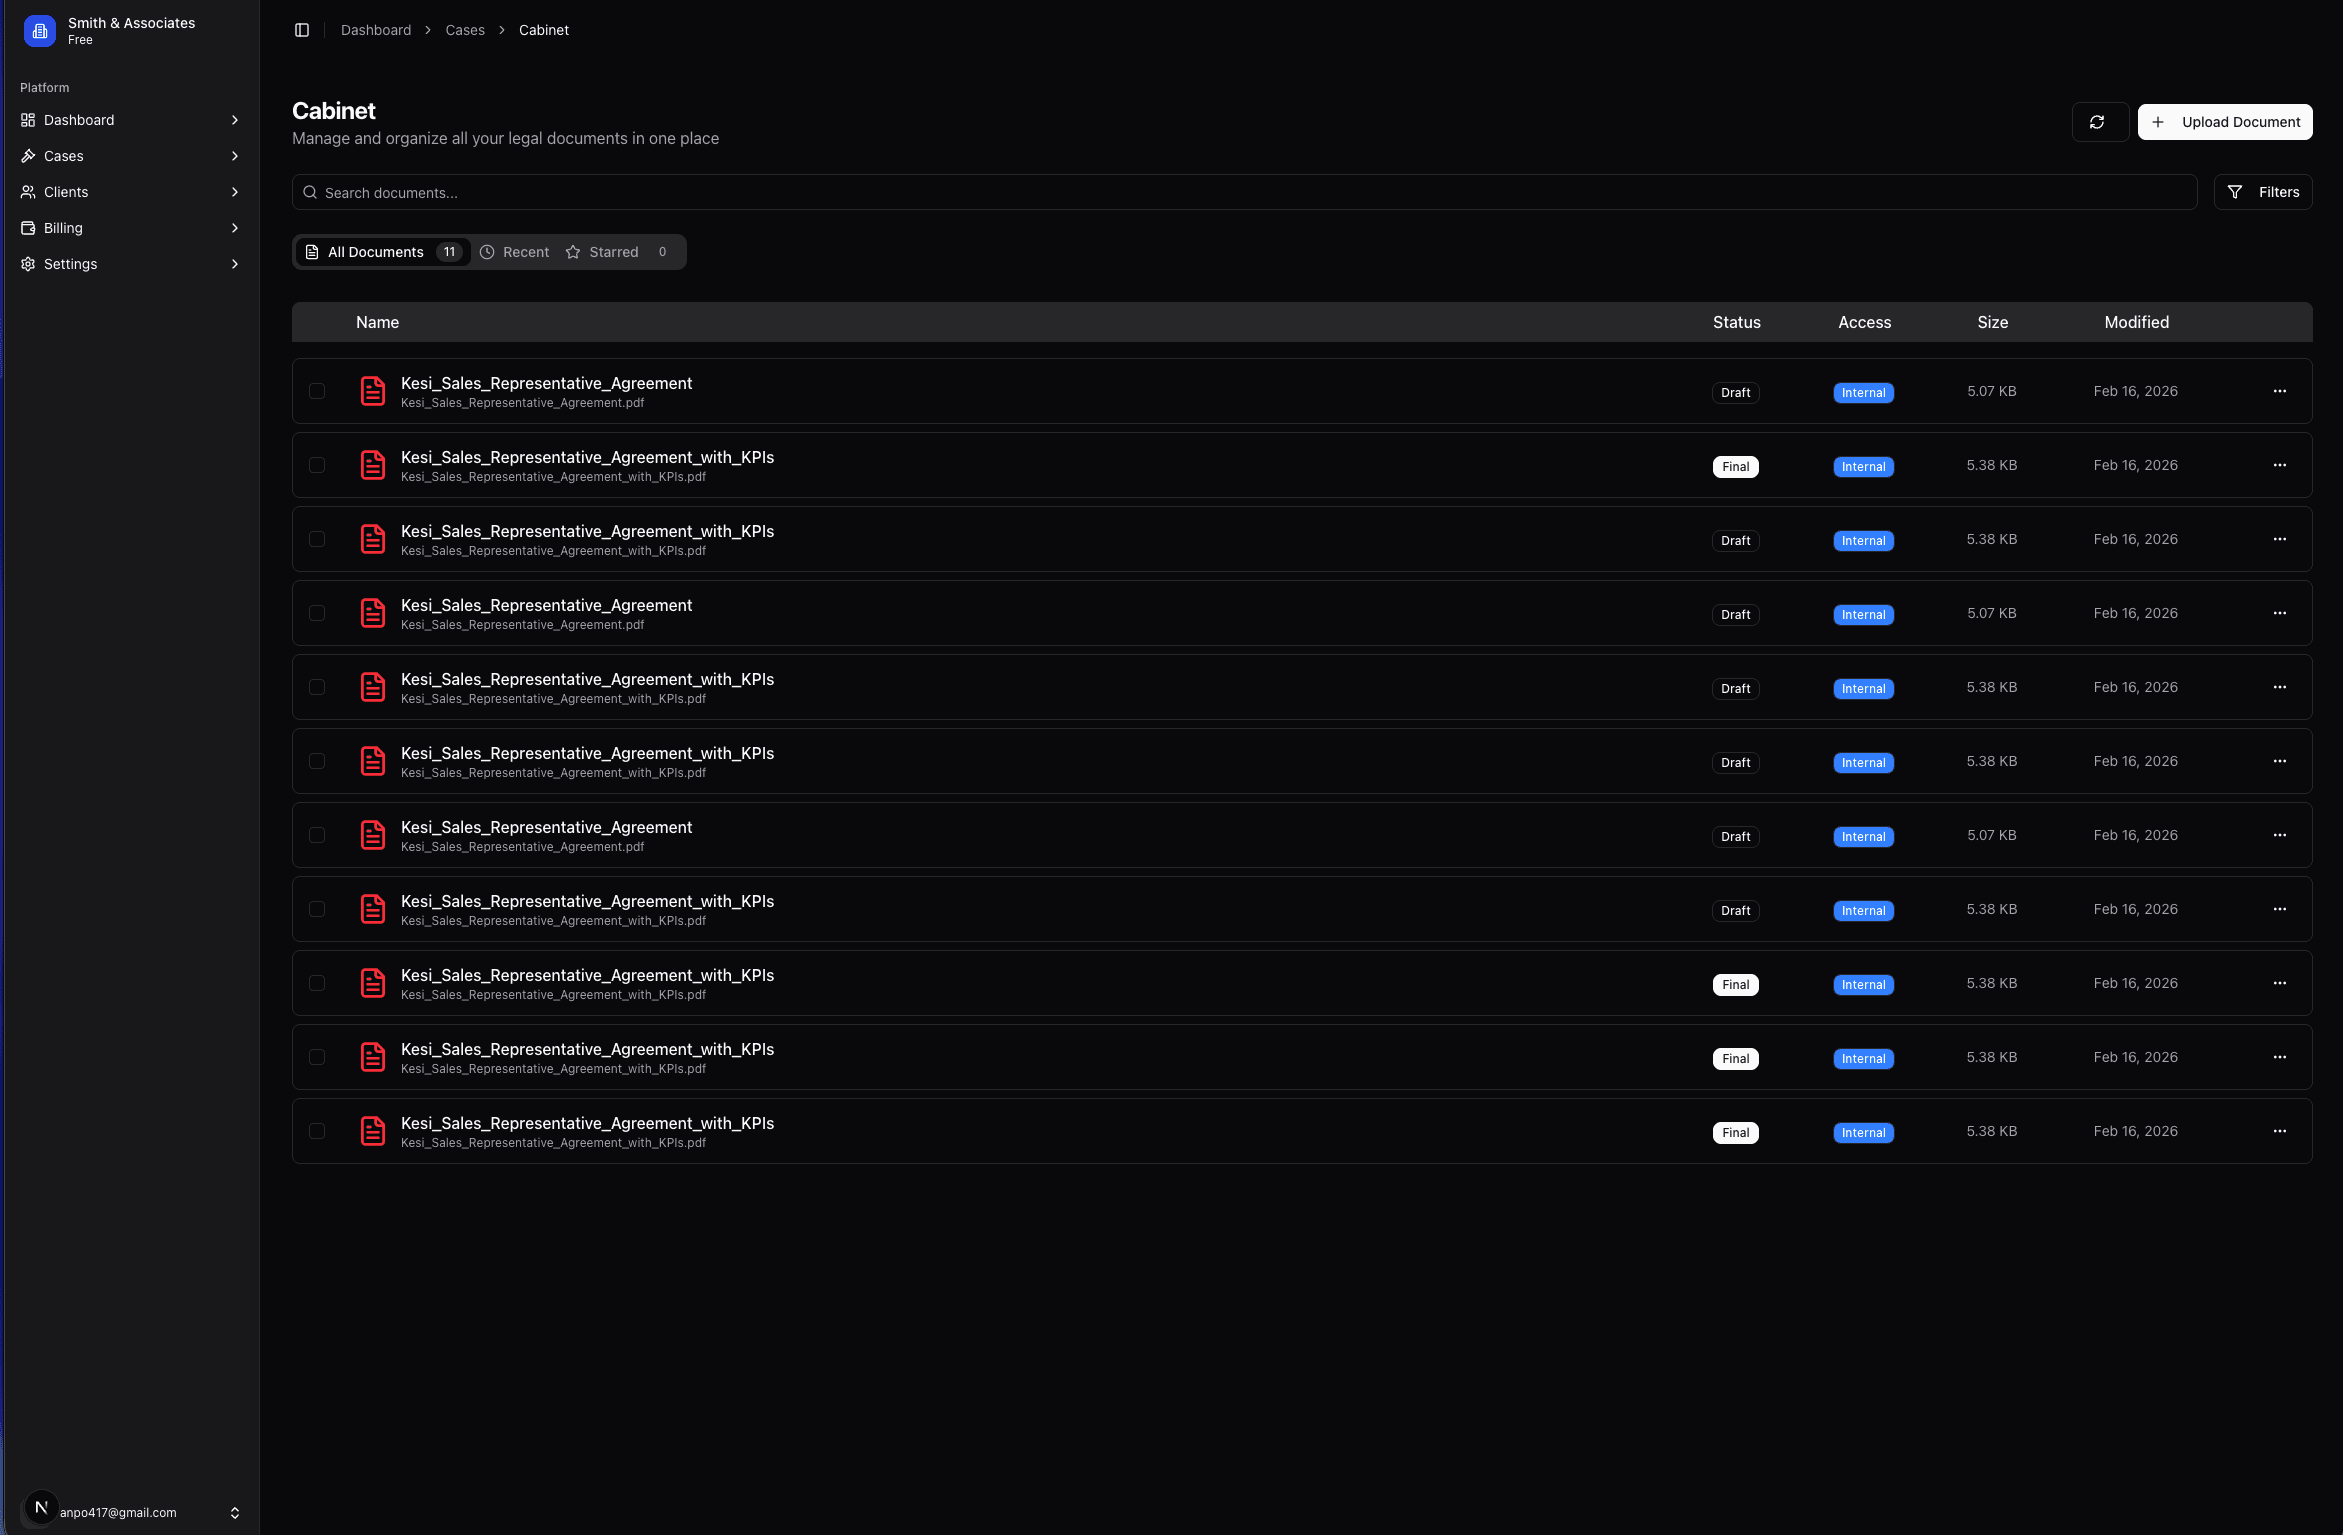
Upload documents
Goal
Store and organize all matter-related documents in a single, secure source of truth.
What this does
Store case and client documents securely in one place so your team can find what they need instantly.
Step-by-step
- 1
Go to Documents or open a specific case and switch to the Documents tab.
- 2
Click "Upload" or drag and drop your files into the upload area.
- 3
Select the case and client the documents belong to if prompted.
- 4
Optionally add tags or descriptions to make documents easier to search.
- 5
Wait for the upload to complete and confirm the files appear in the list.
Set roles and permissions
Goal
Give each team member the access they need while keeping sensitive information protected.
What this does
Control who can see and change information in Kesi by assigning roles and fine-grained permissions.
Step-by-step
- 1
Open Settings from the dashboard.
- 2
Go to the Roles & Permissions section.
- 3
Review the available roles (for example, Admin, Lawyer, Assistant).
- 4
Adjust what each role can access or do, such as viewing billing, editing cases, or managing users.
- 5
Assign roles to team members so they only see what they need.

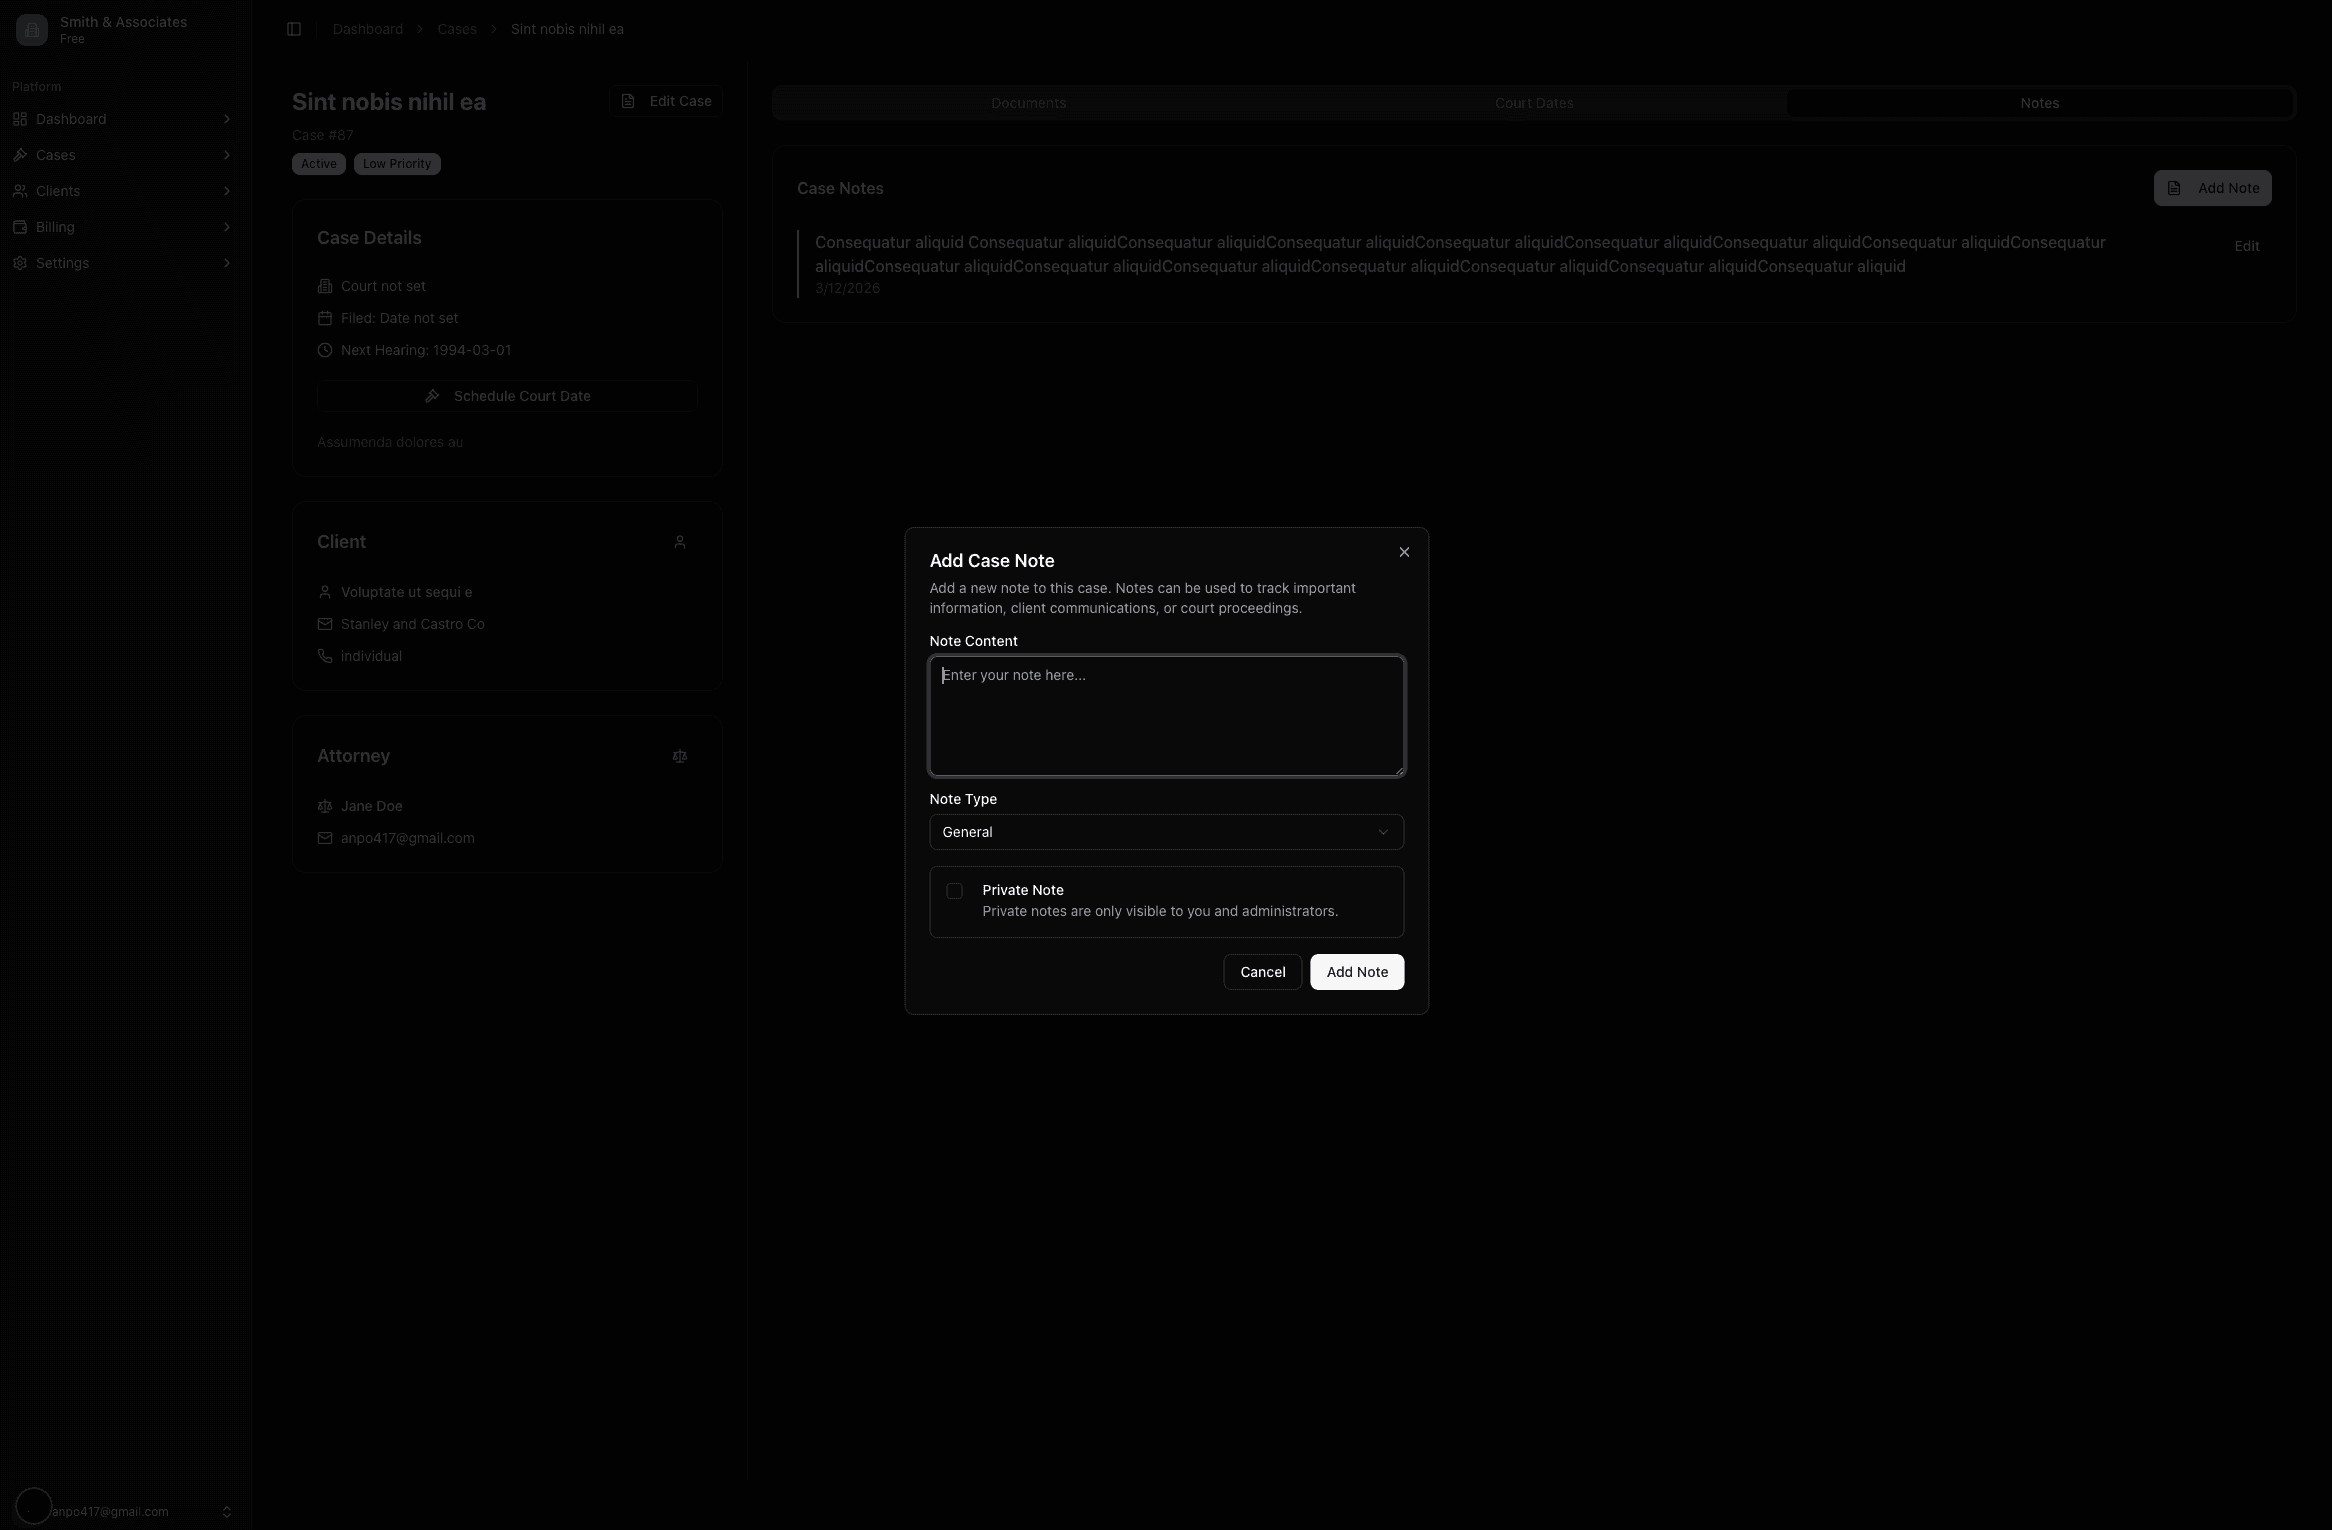
Add notes to cases
Goal
Capture context and decisions directly on the case so your team always has the full picture.
What this does
Capture key context, updates, and internal comments directly on each case so nothing gets lost.
Step-by-step
- 1
Go to Cases and open the case you want to update.
- 2
Find the Notes or Activity section within the case view.
- 3
Click "Add Note" or similar.
- 4
Write your note, including relevant details like call summaries, strategy decisions, or next steps.
- 5
Save the note so it appears in the case history for your team.
Ready to try these workflows in Kesi?
Use this page as a reference as you set up your firm, add clients and cases, and start billing.
Get started with Kesi